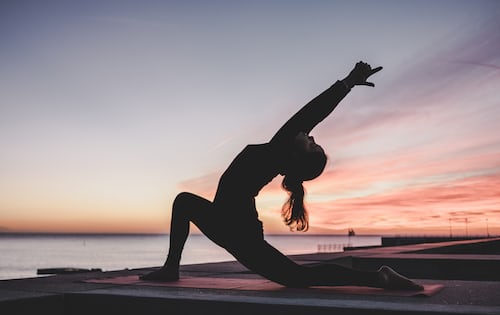
The study shows that for people who struggle to keep their blood pressure at safe levels, even with the help of medications, practicing yoga can be an effective strategy to lower their risk of dangerous complications such as heart attacks or strokes.
Generally speaking, yoga poses that do not invert the body are beneficial for people with high blood pressure. Calming restorative yoga asanas are particularly useful for reducing stress and lowering blood pressure naturally.
- eating a healthy diet
- maintaining a healthy weight
- avoiding alcohol
- reducing stress
- exercising regularly
- quitting smoking if you smoke
Gentle yoga practice
The following yoga practice is gentle and can be therapeutic for people living with high blood pressure. The routine is most comfortable when done on a yoga or exercise mat, preferably on a nonslip surface.1. Bound Angle Pose
This seated pose is an excellent hip opener. It also stimulates circulation. Muscles stretched: neck as well as the inner thighs and hips (adductors and gracilis) Muscles worked: lower back- Sit on your mat and bring the soles of your feet together in front of you, bending your knees as if you’re about to “butterfly” your legs.
- Bring your heels as close to your pelvis as you can, grabbing hold of your toes to gently help this motion.
- As you inhale, sit up tall on your sitting bones. Don’t tuck your pelvis here. That will crunch your lower spine.
- As you exhale, press your knees to the ground.
- Gently and while keeping your spine straight, begin to bend at the hips, taking your ribs toward your feet. If you have the flexibility, you can use your forearms and elbows to press on your knees. This motion should be gentle, not forceful.
- When you lower down as far as you can comfortably go without letting your spine start to curve, release any tension in your neck by dropping your chin. Stay here for 3 to 5 slow, even breaths.
2. Bridge Pose
Bridge Pose provides gentle strengthening of your hamstrings, abdominals, and glutes. The pose can help relieve hip and lower back aches while strengthening your core. While bigger backbends may need to be avoided for people with high blood pressure, this gentler pose provides many of the benefits of deeper backbends without the issues they can cause for people with the condition. Muscles stretched: lower back and hip flexors Muscles worked: gluteus maximus, hamstrings, transverse abdominis, and rectus abdominis.- From Bound Angle, release your feet and place them flat on the floor, knees bent, as you lie back on your mat. Your legs and feet should be parallel and approximately hip-width apart with your arms alongside your body.
- As you inhale, rock your pelvis so your stomach pulls in and your lower back gently presses against the floor. From there, in a fluid motion, lift your hips as you press into your feet.
- You can also press your hands and arms into the ground to help you balance and support the movement. However, the main work should come from your hamstrings, glutes, and abdominals. Keep your shoulder blades in contact with the floor at all times to avoid pressure on the neck.
- Hold the pose for a few breaths with your hips in a diagonal line from the chest, no higher. Avoid strain in the lower back by only raising the hips as high as the abdominals, hamstrings, and glutes can support the movement without arching your lower back.
- As you exhale, gently roll your spine back onto the ground one vertebrae at a time, from your upper back down.
- As you rest and prepare for the next bridge, be sure your spine is neutral. This means your lower back is slightly off the ground, respecting the natural curve of your lumbar spine.
- Do this 10 times with 10 slow, even breaths.
3. Head-to-Knee Forward Bend
This is a therapeutic pose for high blood pressure. It may improve digestion and calm the brain, while it stretches the spine, shoulders, backs of the legs, and groin. Don’t be intimidated by how some people can place their foreheads on their legs. Even if you aren’t super flexible — most of us aren’t — this is a really beneficial pose. Muscles stretched: gastrocnemius (calf muscles), hamstrings, spinal extensors, and latissimus dorsi (lats)- From Bridge, simply sit up on the mat, stretching your right leg out in front of you and pulling your left foot into the juncture between your right leg and your groin — much like Bound Angle but with one leg out straight — so your sole is against the opposite leg’s inner thigh.
- Press your left hand into the crease of your thigh and groin and your right hand into the ground as you inhale and sit up straight. Extending your spine, turn your torso just slightly, so your bellybutton is lined up with your right thigh.
- As you exhale, begin to fold forward from your groin, not your hips. As you do this, you can use a strap or towel around your foot and hold on to both ends. Or, if you prefer and it doesn’t compromise the bend or your spine, you can reach for your shin or your foot as you bend.
- Your elbows should be bending out to the side as you ease forward. You don’t want to pull yourself into the stretch, but rather keep your spine and neck long as you round your spine forward over your right leg.
- When you’ve reached a comfortable stretch of your hamstrings, calves, and back, pause for a moment. Inhale and feel your spine lengthen. Exhale and ease yourself forward again, deepening the stretch.
- Hold this for 3 more deep, even breaths. Gently sit upright, switch legs, and repeat on the other side.
4. Legs-Up-the-Wall
Legs-Up-the-Wall is a passive and calming inversion pose. Because your heart and head are on level ground, this is a safer inversion option for people with high blood pressure. However, some yoga teachers say no inversion is safe for high blood pressure, so check with your doctor before adding this pose to your routine. Muscles stretched: hamstrings and hips- Place your mat perpendicular to a wall that’s on level ground. Sit parallel to the wall on your mat.
- Lie down with your feet on the ground, knees bent.
- Using your lower back and upper tailbone as your pivot point, pick up your feet and gently swing your torso so it’s perpendicular to the wall. Nestle your sitting bones up against the base of the wall.
- Once you’re comfortable, extend your legs up the wall. You may have to wiggle a little to get there. You can also place a cushion or folded blanket under your lower back if it feels better, but try not to go too high on that angle unless you’ve checked with your doctor first. Keep both shoulder blades in contact with the floor at all times to avoid pressure on your neck.
- Rest your arms next to you, palms up. Hang your hips heavy into the mat. You can stay here as long as you like, as a type of Savasana for your practice.